
Introduction: The Hidden Cost of “Cheap” Hosting in 2025
If you are reading this, you have likely hit a wall. Maybe your website takes four seconds to load, costing you valuable conversions. Perhaps you woke up to a “Server Error 500” message right before a major marketing campaign launch. Or, in the worst-case scenario, you are worried about the rising tide of cybersecurity threats targeting small to mid-sized businesses.
- Introduction: The Hidden Cost of “Cheap” Hosting in 2025
- Part 1: Why Upgrade? Understanding the ROI of Managed Services
- Superior Performance and Core Web Vitals
- Cybersecurity and Compliance
- Scalability and Business Continuity
- Part 2: The Pre-Migration Audit
- Part 3: Choosing the Right Managed Hosting Provider
- Part 4: The Migration Process (Step-by-Step)
- Phase 1: Setting Up the Destination
- Phase 2: moving the Data (The Files)
- Phase 3: Migrating the Database
- Phase 4: The Hosts File Trick (Testing Without Going Live)
- Part 5: The Switch (DNS Propagation)
- Part 6: Post-Migration Checklist
- Conclusion: Investing in Your Digital Future
In the fast-paced digital landscape of 2025, your hosting infrastructure is not just a utility; it is the foundation of your revenue model. While shared hosting plans offered an attractive entry point with low monthly fees, the hidden costs of downtime, security breaches, and slow Time to First Byte (TTFB) metrics are driving a massive migration toward enterprise-grade managed hosting solutions.
Recent market analysis suggests the global web hosting market is projected to exceed $192 billion this year, with a significant pivot toward managed cloud hosting and dedicated server environments. Why? Because business owners are realizing that their time is better spent growing their brand than troubleshooting PHP versions or fighting off DDoS attacks.
This comprehensive guide is designed for the non-technical founder, marketing manager, or business owner. We will walk you through the entire process of migrating from a restrictive shared environment to a robust, scalable managed hosting platform. We will cover everything from disaster recovery planning to the final DNS switch, ensuring your digital assets remain secure and profitable.
Part 1: Why Upgrade? Understanding the ROI of Managed Services
Before we dive into the technical steps, it is vital to understand what you are paying for. When you move to a managed WordPress hosting or cloud VPS provider, you are essentially outsourcing your IT department.
Superior Performance and Core Web Vitals
Google’s Core Web Vitals are no longer just a recommendation; they are a ranking factor. Managed hosting providers utilize advanced technology stacks that shared hosts simply cannot afford to offer at low price points.
- NVMe Storage: innovative Non-Volatile Memory Express drives that read/write data up to 6x faster than standard SSDs.
- Server-Level Caching: Instead of relying on heavy plugins, managed hosts use tools like Varnish or Nginx FastCGI to cache content at the server level, drastically reducing server response times.
- Content Delivery Networks (CDN): Top-tier providers integrate global CDNs (like Cloudflare Enterprise) to serve your content from the “edge,” meaning a visitor in London loads your site from a London server, not one in Texas.
Cybersecurity and Compliance
In 2025, data sovereignty and security are paramount. Cybersecurity for business is a high-stakes game. A single malware infection can result in Google blacklisting your domain, effectively killing your organic traffic overnight.
- Proactive Threat Detection: Managed hosts employ real-time scanning to identify and block malicious code before it executes.
- DDoS Protection: Distributed Denial of Service attacks are becoming cheaper for bad actors to launch. Enterprise-grade hosting includes automated mitigation to absorb these traffic spikes without taking your site offline.
- Automated SSL Certificates: Security is not static. Managed services handle the renewal and implementation of SSL certificates, ensuring your data remains encrypted and your users see that trusted padlock icon.
Scalability and Business Continuity
What happens when your viral marketing campaign works? On shared hosting, your site crashes due to “resource limit exceeded” errors. On a cloud hosting solution, resources can often be auto-scaled. You pay for what you use, but you never lose a customer because your server was too small. This elasticity is crucial for e-commerce sites running high-traffic sales events.
Part 2: The Pre-Migration Audit
Migration is not just about moving files; it is about cleaning house. Moving a messy, infected, or bloated site to a dedicated server will not magically fix its problems. You need a clean slate.
Step 1: Current Host Analysis
Log in to your current dashboard. Note your disk usage, bandwidth consumption, and the specific PHP version your site is running. You need a managed hosting plan that matches or exceeds these specifications. If you are using 10GB of storage now, look for a plan offering at least 20GB to accommodate backups and staging environments.
Step 2: The Content Audit
Use a crawler tool like Screaming Frog (the free version works for smaller sites) to crawl your current website. You are looking for:
- Broken Links (404s): Fix these before you move.
- Large Media Files: Images over 500KB should be compressed.
- Unused Plugins: If you have plugins deactivated, delete them. They are security liabilities.
Step 3: Access Credentials
Ensure you have the following information ready. You will need to provide this to your new host or use it yourself:
- Domain Registrar Login: (e.g., GoDaddy, Namecheap) where you bought your domain name.
- FTP/SFTP Details: Hostname, username, password, and port (usually 22 for SFTP).
- Database Access: Usually found in phpMyAdmin or your hosting control panel.
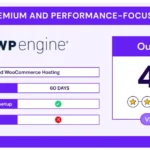
Part 3: Choosing the Right Managed Hosting Provider
This is a high-value decision. The “best” host depends on your specific technology stack.
For WordPress Users
Look for Enterprise WordPress Hosting. Key features to verify:
- Staging Environments: One-click cloning of your site to test changes safely.
- Daily Backups: Automated, off-site backups with one-click restore points.
- 24/7 Expert Support: You want engineers who know WordPress core, not generic tier-1 support agents.
For E-commerce and Custom Apps
If you run Magento, extensive WooCommerce setups, or custom PHP applications, you might need Managed Cloud Hosting or a Dedicated Server.
- Root Access: Do you need to install custom software server-side?
- PCI Compliance: Essential if you handle credit card data directly, though most modern payment gateways (Stripe, PayPal) handle this off-site.
- Uptime Guarantees (SLA): Look for 99.99% uptime guarantees with financial penalties if they fail to deliver.
Part 4: The Migration Process (Step-by-Step)
While many managed hosting services offer free “white-glove” migration where their engineers do it for you, understanding the process is critical for oversight. If you choose to do it yourself or need to move a complex site, follow this protocol.
Phase 1: Setting Up the Destination
Do not cancel your old hosting yet! You will run both accounts simultaneously during the transition.
- Purchase your new plan.
- Create a fresh installation. If moving WordPress, install a blank WordPress instance on the new server. This sets up the correct database structure and file permissions automatically.
- Locate your SFTP credentials for the new server.
Phase 2: moving the Data (The Files)
Your website is made of two parts: files (images, code, themes) and the database (content, user data, settings).
- Connect via FTP Client. Use a tool like FileZilla.
- Download: Connect to your old host and download the
public_htmlfolder (orwp-contentfor WordPress) to your local computer. - Upload: Connect to your new host. Upload the contents of that folder to the corresponding directory.
- Note: This can take time depending on your internet speed and the size of your media library.
Phase 3: Migrating the Database
This is often the trickiest part for non-techies, but it is straightforward with the right tools.
- Export: Log in to phpMyAdmin on your old host. Select your database and click “Export.” Choose the “Quick” method and Format “SQL.” Save the file.
- Create New Database: On your new host, create a new database and a new user. Note down the database name, username, and password.
- Import: Open phpMyAdmin on the new host. Select the new (empty) database. Click “Import,” choose the SQL file you just downloaded, and click “Go.”
- Connect the Two: You must tell the files where the new database is.
- For WordPress, edit the
wp-config.phpfile in your file manager. UpdateDB_NAME,DB_USER,DB_PASSWORD, andDB_HOSTwith the new credentials.
- For WordPress, edit the
Phase 4: The Hosts File Trick (Testing Without Going Live)
This is a pro tip used by developers. You can trick your computer into thinking the site has already migrated, allowing you to test the new server while the rest of the world still sees the old one.
- Find the IP Address of your new server.
- Edit Hosts File:
- Windows: Open Notepad as Administrator. Open
C:\Windows\System32\drivers\etc\hosts. - Mac: Open Terminal and type
sudo nano /etc/hosts.
- Windows: Open Notepad as Administrator. Open
- Add a Line: Type the IP address followed by your domain name (e.g.,
192.168.1.1 mywebsite.com). - Save and Flush DNS: Now, when you visit your site in a browser, it loads from the new managed server. Test everything. Click every link. Test contact forms. Try a test purchase.
- Revert: Delete that line from your hosts file when testing is done.
Part 5: The Switch (DNS Propagation)
Once you are 100% sure the copy on the new server is perfect, it is time to flip the switch.
- Log in to your Domain Registrar.
- Update Nameservers: Replace the old hosting nameservers (e.g.,
ns1.oldhost.com) with the new ones provided by your managed host (e.g.,ns1.newpremiumhost.com). - The Waiting Game: This process is called DNS propagation. It can take anywhere from 1 to 48 hours for the changes to ripple across the internet. During this time, some visitors will see the old site, and some will see the new one.
- Tip: Do not make content updates (new blog posts) during this window, as they might be lost if posted to the old server right before the switch finalizes.
Part 6: Post-Migration Checklist
You have successfully moved to a high-performance cloud hosting environment. Now you must optimize it.
1. SSL Verification
Ensure your SSL certificate is active. Most managed hosts have an “Auto-SSL” feature. Force HTTPS in your settings to ensure no insecure content loads.
2. Email Deliverability
If your email was hosted with your old web host, you might need to migrate email accounts or update MX records. We strongly recommend using a dedicated business email solution (like Google Workspace or Microsoft 365) rather than hosting email on your web server. This separates your communication infrastructure from your hosting infrastructure, a key principle of disaster recovery.
3. Performance Benchmarking
Run your site through Google PageSpeed Insights again. You should see a marked improvement in:
- LCP (Largest Contentful Paint): How fast the main content loads.
- TBT (Total Blocking Time): How responsive the site is.
- If scores are still low, contact your new managed support team. They can often tweak server-side caching (Redis or Memcached) to boost these numbers instantly.
4. Security Headers
Ask your host to implement HSTS (HTTP Strict Transport Security). This tells web browsers that your site should only ever be accessed over HTTPS, preventing protocol downgrade attacks.
Conclusion: Investing in Your Digital Future
Migrating to managed hosting is more than a technical task; it is a strategic business decision. By moving away from shared resources, you gain the dedicated server power needed to scale, the cybersecurity protocols required to protect your customer data, and the peace of mind that comes with automated disaster recovery.
In 2025, the cost of a slow or insecure website is far higher than the monthly premium of managed services. Whether you choose a specialized WordPress host or a flexible cloud VPS, the investment pays dividends in user experience, SEO rankings, and ultimately, your bottom line.
Don’t let technical fear hold your business back. Follow this guide, take it one step at a time, and give your website the home it deserves.